The film developing process is the chemical and mechanical procedure used to transform an exposed piece of photographic film into a visible negative that can later be printed or scanned. Unlike digital photography, where an image appears almost instantly, traditional film development requires careful handling of film, controlled chemistry, timing, temperature, and darkness. For photographers interested in traditional film development, understanding each stage can make analog photography more predictable and enjoyable. Whether you are exploring how to develop film for the first time, learning about film photography developing, or looking for practical guidance on developing photographic film at home, the process combines technical precision with a hands-on creative experience.
What Is Traditional Film Development?
Traditional film development is the process of chemically processing photographic film after it has been exposed inside a camera. During exposure, light creates a latent image in the film’s photosensitive emulsion. That image cannot normally be seen immediately. Chemical processing converts the latent image into a stable negative that records the photograph.
This approach is central to analog film developing and has been used in photography for generations. Although digital cameras dominate modern photography, film remains popular because of its distinctive grain, tonal characteristics, color rendition, and physical connection to the photographic process.
The basic stages generally include:
- Loading the exposed film onto a reel in darkness.
- Placing the reel inside a developing tank.
- Applying film developer.
- Using a stop bath or water rinse.
- Applying fixer solution.
- Washing the film.
- Drying the negatives.
- Inspecting, storing, scanning, or printing the finished film.
The exact procedure varies according to the film type, chemistry, and manufacturer’s instructions.
How Does Traditional Film Developing Work?
To understand how does traditional film developing work, it helps to look at what happens to the film during each chemical stage.
Photographic film contains light-sensitive silver halide crystals suspended in an emulsion. When the film is exposed to light, some of these crystals undergo a chemical change that creates a latent image.
The developer makes the latent image visible by reducing exposed silver halide into metallic silver. At this point, the film contains both developed silver and undeveloped light-sensitive material.
The stop bath then halts or sharply slows the development process. The fixer removes the remaining undeveloped silver halides, making the image resistant to further exposure. Finally, washing removes residual processing chemicals.
The result is a film negative that can be examined under normal light.
Step by Step Film Developing Process
A step by step film developing process is easier to understand when each stage is considered separately. Beginners should always follow the instructions supplied with their particular film and chemicals because processing times, dilution ratios, temperatures, and agitation requirements can vary.
1. Gather the Required Equipment
Before beginning, prepare the equipment needed for film developing. Typical equipment includes:
- Developing tank
- Film reel
- Changing bag or suitable darkroom
- Measuring containers
- Thermometer
- Timer
- Graduates or chemical mixing containers
- Film clips or drying clips
- Scissors
- Water source
- Appropriate chemicals
- Protective gloves and eye protection
- Storage sleeves for finished negatives
A developing tank is particularly important because it allows chemicals to reach the film while the film remains protected from light. The film reel keeps the film separated so processing chemistry can flow around the emulsion.
2. Load the Film in Darkness
The film must be removed from its cassette and loaded onto the reel without exposure to light. A changing bag or darkroom can be used for this stage.
This is one of the most delicate parts of the home film developing process. Beginners should practice handling an unused or already processed roll before attempting to load an important exposed roll.
The film is normally cut from the cassette, attached to the reel, and carefully wound around it. The reel is then placed inside the developing tank, which can be closed securely before the lights are turned on.
Once the tank is light-tight, the remaining stages can generally be performed under normal lighting.
3. Prepare the Chemicals
The chemicals used in film developing depend on whether you are processing black-and-white or color film.
For a basic black-and-white workflow, the primary chemicals are:
- Film developer
- Stop bath
- Fixer solution
- Washing water
- Optional wetting agent
A film developer, also called a photographic developer, converts the exposed silver halide into metallic silver. The stop bath interrupts development, while the fixer removes unexposed silver halides.
When selecting the best chemicals for developing film, it is more useful to choose chemistry designed specifically for your film stock and processing method rather than assuming one product is universally best. Manufacturer recommendations, film characteristics, temperature requirements, and desired contrast should all be considered.
4. Use the Film Developer
The developer is the chemical that brings the latent image into visible form.
Pour the correctly prepared developer into the tank and begin timing according to the film and developer manufacturer’s instructions. Agitation is normally required at specific intervals to ensure fresh developer reaches the emulsion evenly.
Development time can influence contrast, density, and overall appearance. Excessive development may increase contrast, while insufficient development can result in thin negatives.
Temperature is also important. Chemical reactions occur differently at different temperatures, so maintaining the recommended processing temperature helps produce consistent results.
This stage is one of the most important film development techniques because small changes in time, temperature, or agitation can influence the final negative.
5. Apply the Stop Bath
After development, the developer must be stopped.
A stop bath is an acidic solution designed to rapidly halt development. Some photographers instead use a water rinse, depending on their processing method and chemistry.
The purpose is to prevent the developer from continuing to act on the emulsion while the next chemical is introduced.
The stop stage is brief, but it contributes to process consistency and can help reduce developer carryover into the fixer.
6. Use Fixer Solution
The next stage uses fixer solution.
Fixer removes the remaining light-sensitive silver halides from the film. Without proper fixing, the film would remain sensitive to light and could deteriorate or change appearance over time.
Correct fixing is therefore essential for producing stable film negatives.
The fixer should be used according to its manufacturer’s recommended concentration and processing time. After fixing is complete, the film can safely be removed from the tank in normal room light.
7. Wash the Film
Washing removes residual processing chemicals from the film.
Insufficient washing can leave chemical residues that may affect the long-term stability of negatives. The precise washing method varies depending on the chemistry, film type, water temperature, and manufacturer’s recommendations.
Clean water and an appropriate washing procedure are important parts of photographic film processing.
8. Dry the Negatives
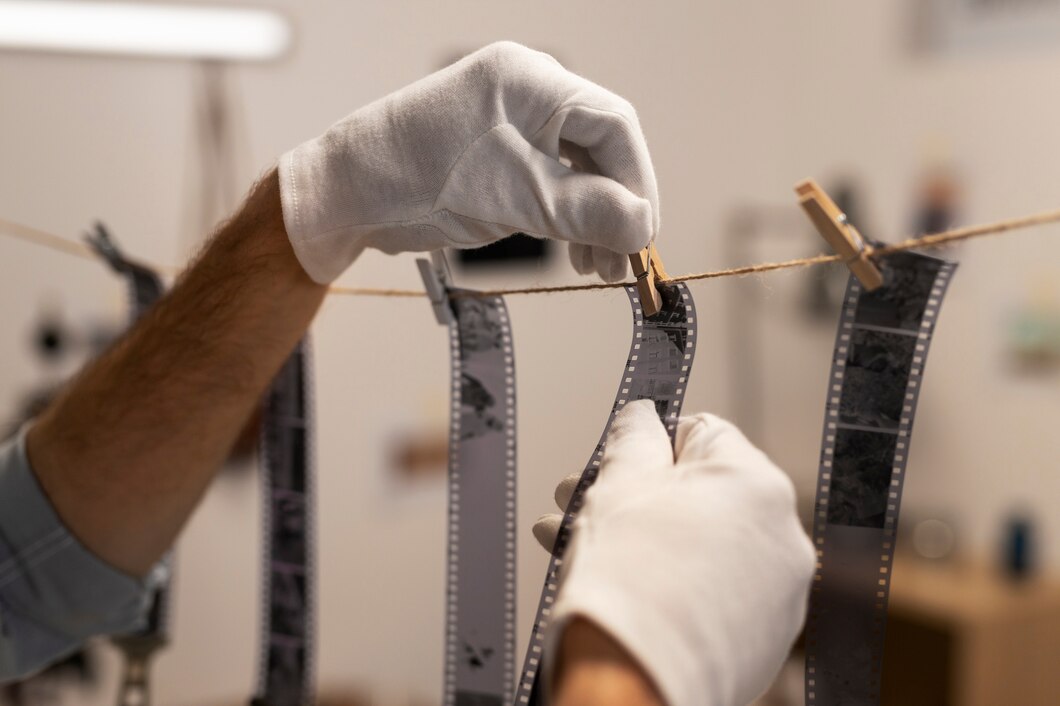
After washing, the film should be handled carefully and placed somewhere clean and relatively dust-free for drying.
Film clips can be attached to the film to keep it hanging straight. Some photographers use a second clip as a weight at the bottom.
Avoid touching the emulsion unnecessarily while the film is wet. Dust and scratches can become frustrating problems later during scanning or printing.
Once completely dry, the film can be cut into manageable strips and stored in archival negative sleeves.
Black and White Film Developing
Black and white film developing is often considered a good starting point for beginners because the process can be relatively accessible and offers considerable creative control.
Black-and-white film generally produces negatives containing metallic silver, creating the familiar range of tones from deep shadows to bright highlights.
If you are learning how to develop black and white film, concentrate on consistency. Keep track of:
- Film stock
- Developer
- Dilution
- Temperature
- Development time
- Agitation method
- Fixing time
- Washing procedure
Keeping a processing notebook can help you identify which adjustments produce the results you prefer.
Color Film Developing
Color film developing requires greater control than many basic black-and-white workflows. Different color processes have specific chemical requirements, temperatures, timing, and agitation procedures.
For example, common color-negative processing systems use dedicated chemistry designed for color film. Color development is sensitive to temperature variation, making accurate temperature control especially important.
Anyone attempting color film developing should follow the chemistry manufacturer’s instructions closely rather than applying black-and-white processing procedures to color film.
Color processing can be performed at home, but it generally requires more preparation and consistency.
How to Develop Photographic Film at Home
Learning how to develop photographic film at home can be an affordable and rewarding way to explore analog photography. You do not necessarily need a traditional permanent darkroom.
A changing bag can provide darkness for loading film, while a daylight developing tank allows the remaining chemical stages to take place under normal light.
A basic home setup can include a tank, reel, thermometer, timer, measuring containers, chemicals, washing area, and drying space.
The most important considerations are organization, cleanliness, accurate measurements, and safe chemical handling.
Before starting, read all product labels and safety instructions. Work in an adequately ventilated area, avoid skin and eye contact with processing chemicals, and dispose of used chemistry responsibly according to local requirements.
Darkroom Photography and Required Equipment
Traditional darkroom photography provides a broader environment for film processing and photographic printing. A complete darkroom may contain more equipment than is necessary for simply developing negatives.
Typical darkroom equipment can include:
- Enlarger
- Negative carrier
- Safelight appropriate for the photographic material
- Developing trays
- Print tongs
- Timer
- Easel
- Chemical storage containers
- Film developing tank
- Film reels
- Drying equipment
However, developing film and printing photographs are separate activities. You can develop negatives at home and scan them digitally without owning a complete darkroom.
Film Photography Developing vs. Digital Photography
One of the biggest differences between film photography developing and digital photography is the physical nature of the workflow.
Digital photography produces an electronic image file that can be reviewed immediately. Film photography creates a physical negative that must be processed before the captured image becomes accessible.
This additional process can encourage photographers to slow down and think more carefully about exposure, composition, lighting, and camera settings.
The imperfections of analog photography can also become part of the creative aesthetic. Grain, slight variations in exposure, color shifts, and other characteristics can contribute to the distinctive appearance of film.
Traditional Film Development Techniques
There are several traditional film development techniques that photographers use to control the appearance of their negatives.
Standard Development
Standard development follows the recommended processing time and chemistry for a particular film.
Push Processing
Push processing involves intentionally increasing development to compensate for film exposed at a higher effective ISO. This can affect contrast and grain.
Pull Processing
Pull processing involves reducing development to accommodate film exposed at a lower effective ISO. It can be used to control contrast and tonal characteristics.
Different Agitation Patterns
Agitation affects how evenly fresh developer reaches the film emulsion. Different agitation methods can influence contrast and development consistency.
These techniques should be explored systematically rather than changed randomly. Keeping detailed notes makes it easier to reproduce successful results.
Common Mistakes in Film Developing
The film developing process for beginners can seem complicated, but many problems can be avoided with preparation.
Incorrect Temperature
Temperature affects chemical activity. Always use a reliable thermometer and follow the chemistry manufacturer’s recommended range.
Poor Agitation
Insufficient or inconsistent agitation can contribute to uneven development.
Incorrect Chemical Dilution
Using the wrong dilution can produce unpredictable results. Measure chemicals carefully.
Inadequate Fixing
If film is not properly fixed, residual silver halides may remain.
Insufficient Washing
Chemical residue can potentially affect the long-term stability of negatives.
Dust and Scratches
Dirty equipment or careless handling can leave marks that become highly visible during scanning.
Poor Record Keeping
Without notes, it can be difficult to determine why one roll looks different from another. Recording processing details makes experimentation much easier.
How to Get Better Results From Analog Film Developing
Consistency is more important than expensive equipment when learning analog film developing.
Start by processing one film stock with one developer and follow the recommended procedure. Once you understand the baseline results, experiment with development time, agitation, or other variables individually.
Avoid changing several factors simultaneously. If you change the film, developer, dilution, temperature, and development time at the same time, it becomes difficult to determine which change affected the result.
Another useful practice is to inspect negatives carefully. Look at shadow detail, highlight density, contrast, grain, and physical defects. Over time, this helps you understand the relationship between exposure and processing.
Storing Film Negatives
Once your negatives have dried completely, store them in appropriate archival sleeves.
Keep negatives away from excessive heat, moisture, dust, and direct sunlight. Proper storage helps preserve the physical record of your photographs for future scanning or printing.
Film negatives are more than temporary intermediates. They are the original physical representation of the photographs captured on film, so careful storage is an important part of long-term analog photography.
Why People Still Choose Traditional Film Development
Despite the convenience of digital cameras, traditional film remains attractive for several reasons.
First, film creates a physical connection between the photographer and the image. Instead of immediately reviewing every exposure, photographers often need to wait until the film has been processed.
Second, different films have distinct visual characteristics. Grain structure, contrast, color response, and tonal rendering can all contribute to the final appearance.
Third, the chemical process itself can be creatively satisfying. Learning developing photographic film gives photographers greater control over an image from exposure through processing and scanning or printing.
Finally, traditional film development encourages patience and experimentation. Mistakes can become useful lessons, and small processing changes can produce noticeably different results.
Frequently Asked Questions
How does traditional film developing work?
Traditional film developing uses chemical solutions to convert the latent image created during exposure into a visible and stable negative. Developer creates the image, stop bath interrupts development, and fixer removes remaining light-sensitive material.
What equipment is needed for film developing?
The basic setup usually includes a developing tank, film reel, changing bag or darkroom, thermometer, timer, measuring containers, appropriate chemicals, washing facilities, and drying clips.
Can film be developed at home?
Yes. A home film developing process can be performed with a relatively compact setup, especially for black-and-white film. Careful chemical handling, accurate timing, temperature control, and proper disposal are important.
What chemicals are used in film developing?
Common black-and-white processing involves a developer, stop bath, and fixer, followed by washing. Color film requires chemistry designed for the specific color process.
Is black-and-white film easier to develop than color film?
For many beginners, black-and-white processing is a more accessible introduction because it can provide greater flexibility in chemistry and processing conditions. Color processing generally requires more precise control.
What is a film developer?
A film developer is a chemical solution that converts exposed silver halide crystals into metallic silver, making the latent image visible.
Why is fixer necessary?
Fixer removes unexposed silver halides from photographic film so the processed image becomes stable and can safely be exposed to normal light.
Final Thoughts
The traditional film developing process combines chemistry, craftsmanship, and photography in a way that remains relevant even in the digital era. From loading film onto a reel to carefully controlling development, stopping the chemical reaction, fixing, washing, and drying the negatives, every stage contributes to the final result.
For beginners, the best approach is to start with a straightforward step by step film developing process, follow the instructions for the chosen film and chemistry, maintain consistent temperature and timing, and keep detailed processing notes. As confidence grows, photographers can explore different film development techniques, push and pull processing, alternative developers, and more advanced darkroom practices.
Whether your interest is how to develop film, how to develop black and white film, photographic film processing, or the broader craft of analog photography, traditional development offers an opportunity to understand photography at a deeper, physical level. With patience, careful preparation, and consistent technique, developing film can become more than a technical task—it can become an integral part of the creative photographic process.
About the Author